Camping Toilet DIY: Easy Steps for a Portable Solution
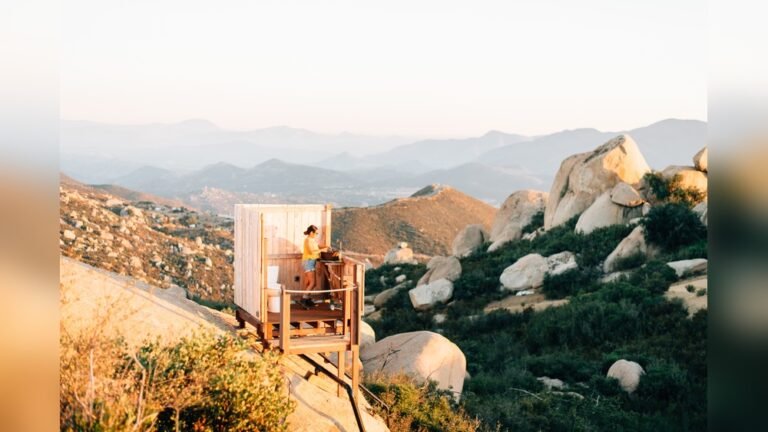
Camping is amazing—until you need a bathroom. Nature calls, but the woods are not always friendly. Maybe you have tried digging a hole, but it feels messy and uncomfortable. Some campgrounds have no toilets at all. The idea of using a dirty public restroom or going behind a bush can ruin the whole trip.
This is why many campers make their own DIY camping toilet. It’s simple, cheap, and can make outdoor life much more comfortable. In this guide, you’ll learn exactly how to build one, what you need, and how to use it safely and responsibly.
Why Build A Diy Camping Toilet?
Bringing your own camping toilet solves many problems:
- No need to walk far at night.
- More privacy and comfort.
- Better hygiene—especially for families or women.
- Good for the environment if used correctly.
A homemade toilet is also much cheaper than buying a portable one. Most can be built with items you already have at home.
Types Of Diy Camping Toilets
There are a few main designs. Each one has pros and cons. Let’s look at the most popular options.
Bucket Toilet
The 5-gallon bucket toilet is the classic DIY option. You just need a strong bucket, a seat, and a waste bag.
Pros:
- Easy to make
- Cheap
- Works for groups
Cons:
- Needs bags for waste
- Not as private as some options
Cat Hole Or Trowel Toilet
This method is the simplest. You dig a small hole and use it directly. It’s called a cat hole.
Pros:
- No tools needed except a trowel
- No need to carry waste
Cons:
- Not allowed in some parks
- Not comfortable for everyone
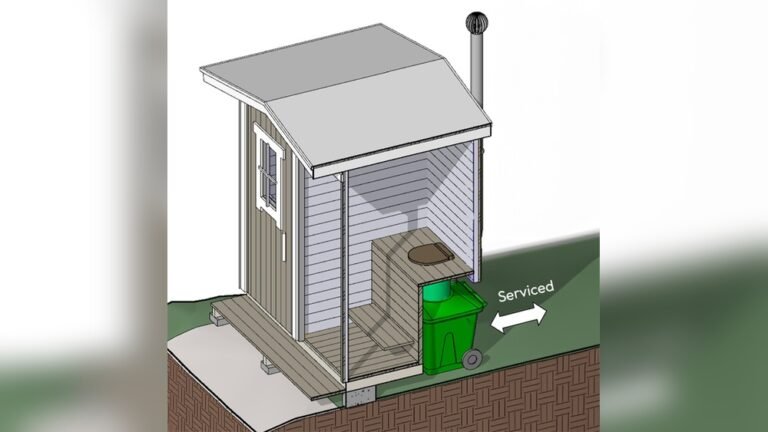
Composting Toilet
A composting toilet is a more advanced DIY project. It separates liquid from solid waste and uses materials like sawdust to help break down waste.
Pros:
- Eco-friendly
- Less smell
Cons:
- Takes more work to build
- Needs more parts
Bag Toilet (wag Bag)
This design uses a special bag with chemicals that break down waste. Some people call them WAG bags.
Pros:
- Very light and portable
- Good for sensitive areas
Cons:
- Need to buy special bags
- Not reusable
What You Need: Basic Materials
Before you start, gather these items:
- 5-gallon bucket (or similar container)
- Toilet seat (can buy or make)
- Heavy-duty trash bags (13-gallon or 20-gallon)
- Absorbent material (sawdust, kitty litter, or peat moss)
- Trowel or small shovel (if digging holes)
- Hand sanitizer or wipes
- Privacy shelter or tent (optional)
Some extras:
- Pool noodle (for a soft seat)
- Duct tape
- Rubber gloves
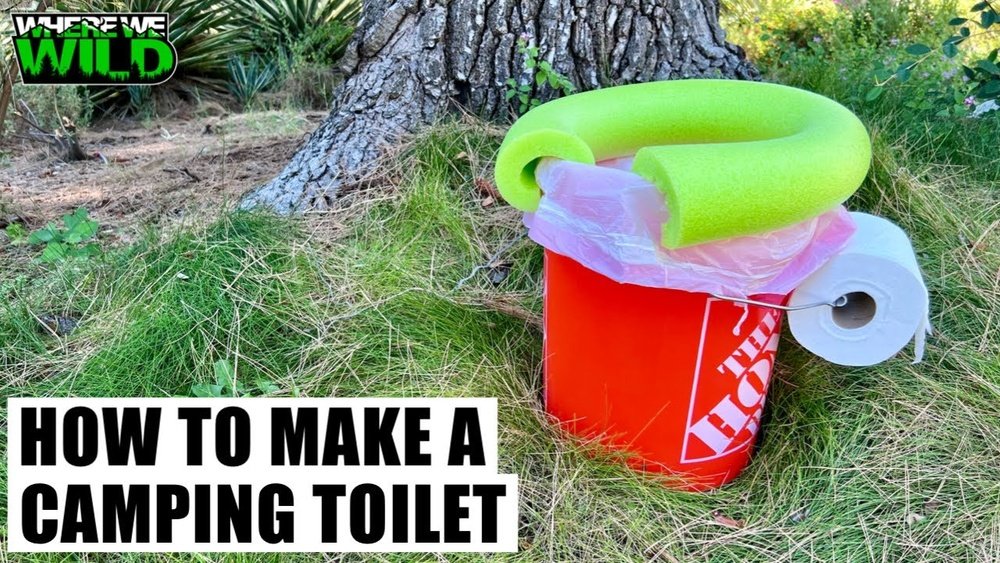
How To Make A Bucket Camping Toilet
Let’s go step by step.
Step 1: Prepare The Bucket
Pick a clean, strong bucket. A 5-gallon size works best. Wash it well and dry it. If you want, decorate the outside or add a handle for easy carrying.
Step 2: Add The Seat
You have two main choices:
- Buy a snap-on toilet seat designed for buckets.
- Make your own using a pool noodle. Cut the noodle lengthwise and fit it around the bucket rim.
Both options work, but the pool noodle is softer and cheaper.
Step 3: Line The Bucket
Open a heavy-duty trash bag and place it inside the bucket. Make sure the edges fold over the rim. This keeps everything clean and makes it easy to remove waste.
Step 4: Add Absorbent Material
Before using, put a layer (about 1 inch) of kitty litter, sawdust, or peat moss in the bottom. This soaks up liquid and controls smells.
Step 5: Use And Maintain
When you use the toilet, sprinkle a bit more absorbent material over the waste each time. After a few uses (or at the end of each day), tie up the bag and dispose of it in a safe place. Never leave waste bags in the wild.
Sample Build: Simple Bucket Toilet
Here’s a quick summary of the build:
- 1 five-gallon bucket
- 1 pool noodle (or toilet seat)
- 2 heavy-duty trash bags
- Kitty litter or sawdust
Steps:
- Cut the pool noodle and fit around the bucket rim.
- Line with a trash bag.
- Pour in 1 cup of kitty litter.
- After use, sprinkle more litter.
- Remove and tie the bag for disposal.
Comparison: Diy Bucket Toilet Vs Store-bought Portable Toilet
Here’s a quick look at how a homemade toilet compares to a commercial one.
| Feature | DIY Bucket Toilet | Store-Bought Toilet |
|---|---|---|
| Cost | $10–$20 | $50–$120 |
| Weight | 2–3 lbs | 5–10 lbs |
| Ease of Cleaning | Bag removal | Flush or chemical clean |
| Durability | Very good | Depends on model |
| Comfort | Basic | Better |
How To Use A Cat Hole Toilet Safely
Some places allow digging small holes for waste. Here’s how to do it right:
- Walk at least 200 feet (about 70 steps) from water, trails, and campsites.
- Dig a hole 6–8 inches deep and 4–6 inches wide.
- Do your business in the hole.
- Cover with dirt and natural materials.
- Pack out used toilet paper in a bag.
Never dig a cat hole in rocky, snowy, or protected areas. Always check local rules first.
Important Tips For Using Diy Camping Toilets
- Always pack out waste where required. Many parks now ban burying waste.
- Use biodegradable toilet paper.
- Bring extra bags and absorbent material. You’ll use more than you think.
- Keep hand sanitizer next to your toilet.
- Set up a small privacy tent if camping with others.
- Mark the toilet area clearly so others know it’s in use.

Credit: www.treksw.com
Mistakes To Avoid
Many beginners make small errors that cause big problems. Here are some to watch for:
- Using thin or cheap trash bags—they tear easily.
- Not enough absorbent material—this leads to bad smells and leaks.
- Leaving waste behind—this can damage nature and break the law.
- Placing the toilet too close to camp or water.
- Forgetting hand washing supplies.
A small mistake can ruin the trip—or get you fined by rangers.
Upgrades For Your Diy Camping Toilet
Want extra comfort? Try these ideas:
- Add a real toilet seat: Buy a snap-on seat for extra support.
- Build a privacy screen: Use a pop-up tent or hang a tarp.
- Odor control: Sprinkle baking soda over waste to cut smells.
- Foot platform: Place a small mat or board under the bucket for stability.
- Lighting: Use a small lantern or headlamp for nighttime use.

Credit: www.youtube.com
Responsible Waste Disposal
Not everyone knows how to dispose of camping toilet waste correctly. Here’s what you need to do:
- Double-bag waste if you have to carry it out.
- Never dump waste or bags in nature or water.
- Only use trash cans that allow human waste (check local rules).
- In some places, use special WAG bags with chemicals that break down waste.
It’s not fun to carry your waste, but it protects the outdoors for everyone.
Table: Absorbent Materials Compared
Choosing the best material can make your toilet much nicer to use.
| Material | Cost | Odor Control | Availability |
|---|---|---|---|
| Kitty Litter | Low | Good | Very easy |
| Sawdust | Very low | Excellent | Easy (if you have woodshop) |
| Peat Moss | Medium | Excellent | Garden stores |
| Baking Soda | Low | Fair | Easy |
Advanced: Diy Composting Toilet
If you want to go green, try a simple composting toilet for your campsite. This is a bit more work but better for the environment.
Materials Needed
- Two buckets (one for solids, one for liquids)
- Separator (can buy or make from plastic)
- Sawdust or peat moss
- Snap-on seat
Steps
- Fit the separator in the toilet seat. This sends liquids to one side, solids to the other.
- Use sawdust to cover solids after each use.
- Empty the liquid bucket daily.
- Compost solids if allowed, or double-bag and pack out.
This design stops smells and is better for long trips.
Packing And Transport Tips
- Keep all toilet parts in a waterproof bag or box.
- Always carry more bags and material than you think you’ll need.
- If driving, keep the toilet upright in your trunk.
- Bring rubber gloves for waste handling.
Non-obvious Insights Most Campers Miss
- Absorbent material matters a lot. The wrong material means more odor and leaks. Kitty litter and sawdust work much better than just toilet paper or leaves.
- Privacy improves the experience. Even a simple tarp or umbrella can make you relax more and use the toilet properly.
- Local rules change often. Check park websites before every trip. Some areas now require you to pack out all waste, no matter what system you use.
Real-world Example: Family Camping Trip
Sarah and her family camp in national forests every summer. They used to struggle with finding a good bathroom spot. After building a bucket toilet with a pool noodle seat and a pop-up tent, everything changed. Now, even the kids feel comfortable.
Clean-up is easy, and they follow all rules for packing out waste.
Useful Resources
Want to learn more about responsible camping hygiene? The National Park Service has a helpful guide to outdoor toilets and waste rules.
Frequently Asked Questions
What Is The Best Material To Use For A Diy Camping Toilet?
Kitty litter and sawdust are the best for odor control and liquid absorption. Peat moss also works well but is more expensive.
Can I Bury My Waste If I Use A Diy Toilet?
Not always. Many parks require you to pack out all waste. Always check local rules before burying anything.
How Do I Stop Smells From A Camping Toilet?
Use plenty of absorbent material like sawdust or baking soda. Change the bag often and keep the lid closed when not in use.
Is A Diy Camping Toilet Safe For Kids?
Yes, if used and cleaned properly. Always supervise young children and teach them to use hand sanitizer after each use.
How Do I Dispose Of Waste Bags From My Camping Toilet?
Pack them out in a trash can at home or in a waste station that allows human waste. Never leave bags in the wild or regular campground bins.
With a little planning, your own camping toilet can make your next outdoor adventure much cleaner and more comfortable. Enjoy your trip and leave nature just as beautiful as you found it!

Credit: www.motherearthnews.com