Camping Toilet Repair Kit Guide: Fix Issues Fast and Easy
Camping Toilet Repair Kit Guide
When you’re out in nature, a good camping toilet can make your trip much more comfortable. But what happens if your toilet breaks? Many campers have faced leaky seals, broken handles, or clogged valves at the worst possible time. A camping toilet repair kit can save your trip and your mood. This guide explains what these kits are, what they include, how to use them, and tips to keep your camping toilet working smoothly. If you want to camp stress-free, understanding these kits is a must.
What Is A Camping Toilet Repair Kit?
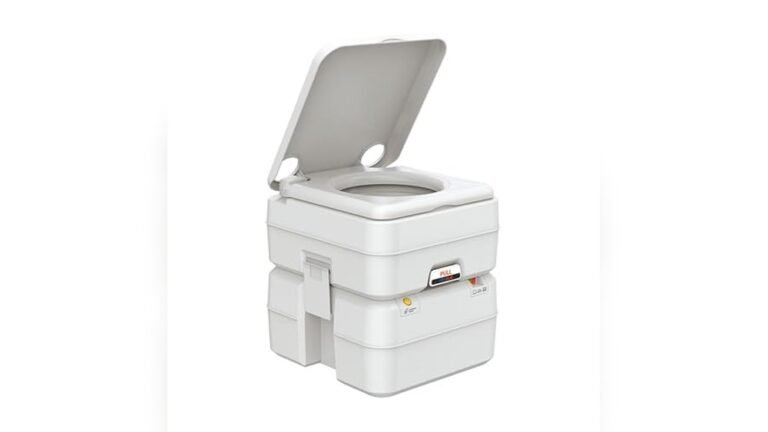
A camping toilet repair kit is a small set of tools, parts, and supplies. It helps you fix common problems with portable camping toilets. These toilets are often used in tents, RVs, boats, and off-grid cabins. They work with water tanks, seals, valves, and pumps. When something goes wrong, a repair kit lets you solve the issue without calling for help or buying a new toilet.
Most kits are lightweight and easy to carry. They fit into your camping gear without adding much weight. This makes them perfect for long hikes or road trips.
Why Every Camper Needs A Repair Kit
Many people believe their camping toilet will work forever if they take care of it. But even the best toilets can break down. Here are a few reasons you should always pack a repair kit:
- Emergencies Happen: Leaks or clogs can strike anytime.
- Remote Locations: Far from stores or help, a kit is your only option.
- Saves Money: Repairing is cheaper than replacing.
- Comfort and Hygiene: A working toilet is important for health and happiness.
If you are new to camping, you might not think about toilet repairs until a problem happens. Experienced campers know that being ready is key.

Credit: www.rvupgradestore.com
What’s Inside A Camping Toilet Repair Kit?
Different repair kits contain different items. Still, most quality kits include a few basic parts and tools. Here’s a look at what you can expect:
1. Replacement Seals And Gaskets
Seals keep water and waste from leaking out. Over time, they can crack or wear out. Most kits include spare seals for the toilet’s main connections and the waste tank.
2. Valve Parts
Flush and drain valves are common failure points. Kits often have replacement valves or valve washers. These help fix leaks or flushing problems.
3. Pump Rebuild Kits
Some portable toilets use a hand pump for flushing. If this breaks, a pump rebuild kit with new O-rings and springs can help.
4. Cleaning Brushes And Lubricants
A small brush helps clean seals and connections. Special lubricants keep seals soft and stop them from drying out.
5. Simple Tools
Small screwdrivers or wrenches are sometimes included. These tools fit the small screws and bolts found on camping toilets.
6. Hose Clamps And Tubing
If your toilet uses a water hose, a kit may include spare clamps and short tubing sections.
7. Instructions
A good kit comes with step-by-step instructions. These are often written for beginners and include helpful diagrams.
Here’s a comparison of typical items found in two popular camping toilet repair kits:
| Item | Basic Kit | Premium Kit |
|---|---|---|
| Replacement Seals | 1-2 sizes | 3-5 sizes |
| Valve Parts | Yes | Yes, plus spare washers |
| Pump Rebuild Kit | No | Yes |
| Cleaning Brush | No | Yes |
| Lubricant | No | Yes |
| Tools | Screwdriver | Screwdriver & Wrench |
| Instructions | Basic | Full with diagrams |
When To Use A Camping Toilet Repair Kit
It’s not always clear when you need to use your kit. Here are the most common signs:
- Water Leaks: Water or waste around the base means a bad seal or valve.
- Flush Problems: Hard-to-use or non-working pumps and flushes often signal broken parts.
- Odors: If your toilet smells bad, seals may not be working.
- Difficulty Emptying: Stuck valves or stiff levers are common issues.
Address these problems quickly. Waiting can make repairs harder and less pleasant.

Credit: www.amazon.com
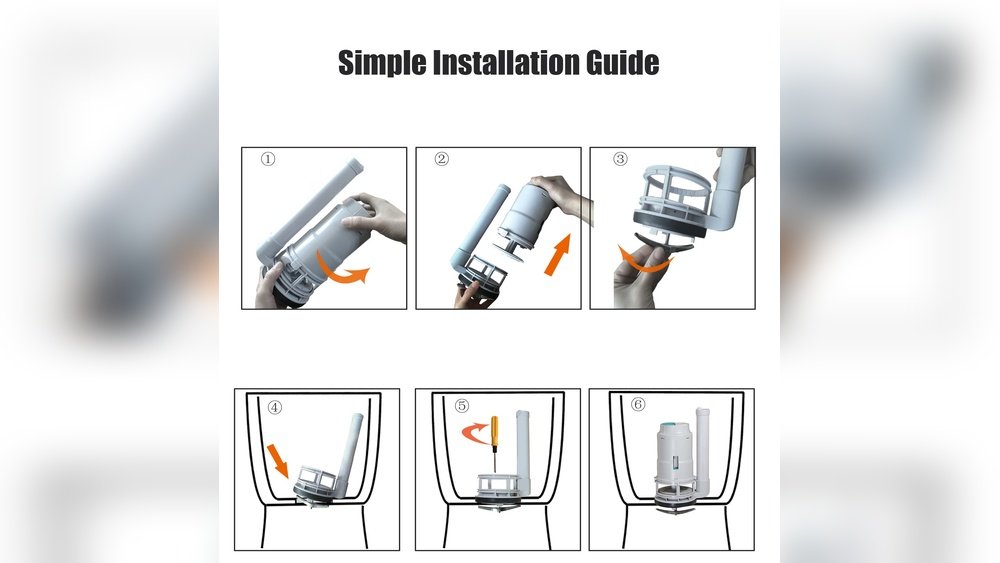
How To Use A Camping Toilet Repair Kit: Step-by-step
Most repairs are easy if you have the right parts and follow these simple steps:
1. Identify The Problem
Look for leaks, check the flush, and try to spot any broken pieces. Take notes or photos if you need to buy extra parts.
2. Prepare Your Work Area
Work on a flat surface. Lay down a plastic sheet or old towel to protect your space. Put on gloves for safety.
3. Disassemble The Toilet
Most portable toilets come apart in two main sections: the top (seat and flush) and the bottom (waste tank). Carefully separate them. Use your tools to remove screws or clamps.
4. Replace Faulty Parts
Swap out old seals, gaskets, or valves with the new ones from your kit. Clean any dirt or buildup before installing new parts. Use the supplied lubricant on all rubber seals.
5. Reassemble And Test
Put the toilet back together. Fill with clean water and test the flush and drain. Make sure there are no leaks or odd noises.
6. Dispose Of Old Parts
Throw away old parts in a trash bag. Wash your hands and tools after finishing.
Pro Tip: Always read the kit’s instructions before you start. Some brands have unique steps or special tools.
Common Problems And How To Fix Them
Some problems happen more often than others. Here are simple solutions for each:
Leaky Toilet Base
Often caused by a worn main seal. Replace it and clean the area before installing a new one. Lubricate the new seal for a tight fit.
Broken Flush Handle
Handles can snap with rough use. Most kits have a spare handle or parts to fix it. Replace broken sections and check the pump.
Stuck Or Jammed Valve
Dirt or waste can block valves. Remove and clean the valve. If it’s cracked or warped, use your kit’s spare.
Foul Odors
Usually a sign that a seal is not working or the tank is not closing right. Replace worn seals and check all connections.
Weak Or No Flush
Caused by a broken pump or blocked line. Use your kit to replace O-rings or springs in the pump. Clean the flush line with the brush.
What To Look For When Buying A Repair Kit
Not all repair kits are the same. Here’s what matters most when choosing one:
- Compatibility: Make sure the kit matches your toilet brand and model.
- Complete Parts List: A good kit covers all common issues, not just one.
- Clear Instructions: Diagrams and simple language help you fix problems fast.
- Quality Tools: Cheap tools can break or damage your toilet.
- Portability: Choose a kit that fits easily into your gear.
Here’s a helpful comparison between two popular camping toilet repair kits:
| Feature | Brand A Kit | Brand B Kit |
|---|---|---|
| Compatibility | Most major brands | Brand B only |
| Number of Parts | 12 | 8 |
| Instructions | Full-color manual | Basic leaflet |
| Tools Included | Yes | No |
| Price | $25 | $18 |
Non-obvious Tips For Trouble-free Toilet Use
Most campers miss these two key insights:
- Lubricate Seals Before Every Trip: Dry seals cause leaks. A small tube of silicone grease keeps seals soft and tight. Don’t wait until you see a leak.
- Check and Replace Parts Annually: Even if nothing seems broken, seals and valves age. Replace them once a year for worry-free trips.
Some brands recommend only using their own parts. But high-quality universal kits often work just as well, and cost less.
Mistakes To Avoid
- Ignoring Small Leaks: Even tiny leaks can become big messes.
- Forcing Stuck Parts: If something won’t move, check for dirt or a broken part instead of using force.
- Mixing Old and New Parts: Always replace all similar parts together (e.g., all seals) to prevent uneven wear.
- Skipping Instructions: Every toilet is a little different. Read the guide before you begin.
Cost And Value
A camping toilet repair kit usually costs between $15 and $30. This is much cheaper than buying a new toilet, which can cost over $100. Even if you only use it once, the kit pays for itself by saving a trip or a vacation.

Credit: www.idsleisure.co.uk
Where To Buy
You can find these kits at outdoor stores, big box retailers, and online. Always buy from trusted sellers. Look for reviews and check if the kit fits your toilet model. For more technical details, the Wikipedia entry on portable toilets gives helpful background.
Frequently Asked Questions
How Do I Know Which Repair Kit Fits My Camping Toilet?
Check your toilet’s brand and model number. Most kits list the toilets they fit. If you’re unsure, contact the manufacturer or bring a photo to the store.
Can I Use Regular Household Tools Instead Of Those In The Kit?
Sometimes, yes. But kit tools are often sized for small parts. Using the wrong tool can strip screws or break delicate pieces.
How Long Do Replacement Seals Last?
Most seals last 1–2 years with normal use. If you camp often, check and replace them every year to avoid leaks.
What Should I Do If My Toilet Still Leaks After Repair?
Make sure all seals are seated correctly and that no old parts remain. If leaks continue, the toilet may have a crack or need professional repair.
Is It Safe To Use Silicone Grease On All Seals?
Yes, silicone grease is safe for most rubber seals. Avoid petroleum jelly, as it can damage rubber over time.
Camping toilets are simple but important for a happy outdoor trip. With a good repair kit and a little know-how, you’ll be ready for any problem. Happy camping!