How to Clean a Camper Toilet: Easy Steps for a Fresh RV
Keeping your camper toilet clean is essential for a pleasant travel experience. A dirty toilet not only smells bad but can also attract insects and bacteria, creating an unhealthy environment. Many new RV owners are surprised by how much maintenance a camper toilet needs compared to a home bathroom.
The small size, unique plumbing, and use of holding tanks mean a little dirt or buildup can quickly lead to big problems. Learning how to clean a camper toilet properly saves you time, money, and headaches on the road. This guide explains everything you need to know, from the supplies to the steps, plus tips that even experienced campers sometimes miss.
Understanding Camper Toilets
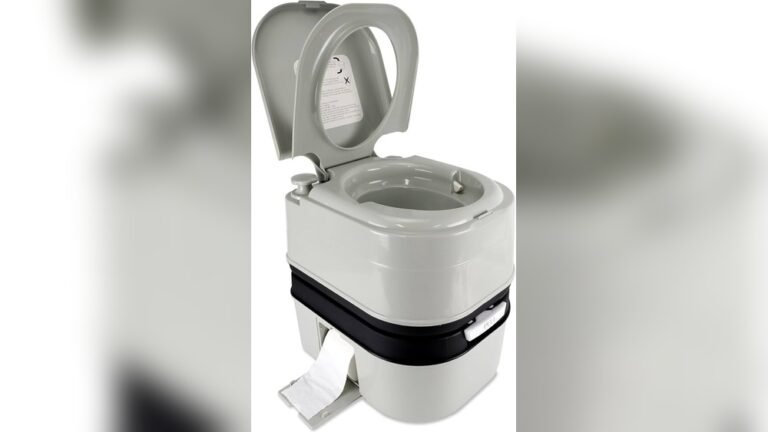
Before you start cleaning, it helps to understand how camper toilets work. Most RVs use gravity-flush toilets, which are similar to home toilets but connect to a black water holding tank instead of city plumbing. Some newer models have cassette toilets or composting toilets. Each type needs slightly different care, but the main cleaning tasks are similar.
- Gravity-flush toilets: Waste drops into a sealed tank below, with water from a small onboard supply.
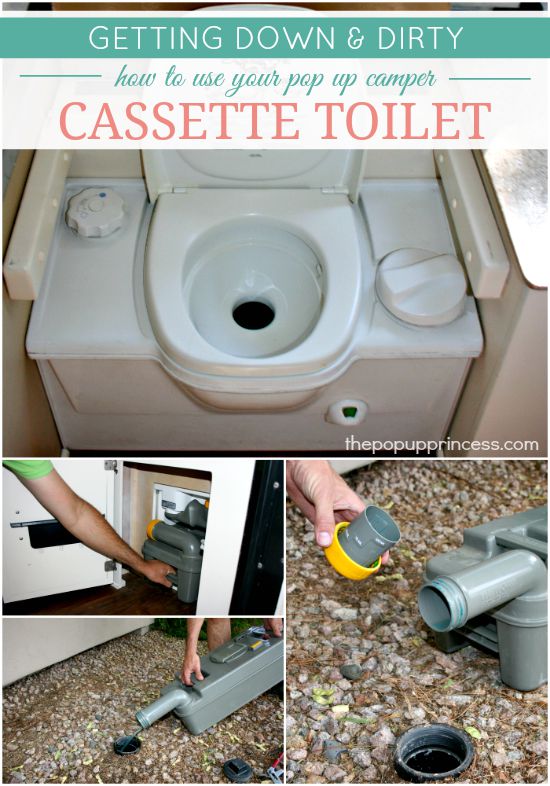
- Cassette toilets: The waste tank is removable and emptied by hand, common in small campers.
- Composting toilets: Separate liquid and solid waste, using natural processes to break down solids.
Knowing your toilet type helps you choose the right products and avoid damage. Using the wrong cleaner can ruin seals or harm friendly bacteria that break down waste in the tank.
Why Camper Toilets Need Special Cleaning
Camper toilets face unique challenges:
- Limited water use: Less water means waste can stick and odors build up faster.
- Holding tanks: Waste sits for days or weeks, not flushed away instantly.
- Plastic and rubber parts: Many strong cleaners for home toilets can damage these materials.
- Sensitive plumbing: Clogs are harder to fix in a camper, and mistakes can be costly.
Because of these differences, it’s important to use RV-safe products and gentle techniques. Regular cleaning keeps your toilet working smoothly, prevents bad smells, and extends the life of your camper’s plumbing.
Essential Supplies For Cleaning A Camper Toilet
To clean your camper toilet safely and effectively, gather these supplies:
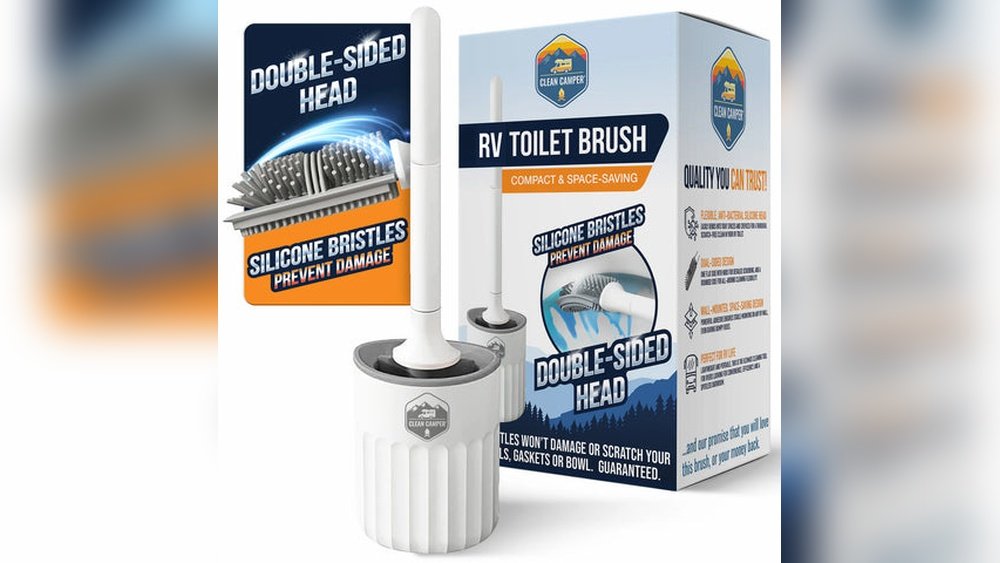
- RV toilet bowl cleaner: Specially made for camper toilets, won’t damage seals or plumbing.
- Toilet brush (soft bristle): Avoid harsh brushes that can scratch plastic bowls.
- Gloves (disposable or rubber): Protects your hands from germs and chemicals.
- Paper towels or cleaning cloths: For wiping surfaces.
- Spray bottle with mild cleaner: For the seat, lid, and exterior surfaces.
- White vinegar or baking soda: Natural options for odor control and light cleaning.
- Holding tank treatment: Breaks down waste and controls odor in black tanks.
- Bucket of clean water: Useful if your fresh water supply is low.
Never use bleach or harsh bathroom cleaners designed for home toilets, as these can harm RV plumbing and rubber seals.
Step-by-step Guide To Cleaning A Camper Toilet
Cleaning a camper toilet involves more than just scrubbing the bowl. Here’s a complete process that covers every part, including the tank.
1. Prepare And Protect
Put on gloves before starting. Open a window or vent for fresh air. If possible, empty the black water tank before you begin. This makes cleaning easier and prevents splashing.
2. Clean The Toilet Bowl
- Squirt RV toilet bowl cleaner around the inside of the bowl.
- Let it sit for at least 5 minutes. This helps dissolve stains and kills germs.
- Use a soft toilet brush to scrub all surfaces, including under the rim and around the flush valve.
- Pay special attention to spots where waste sticks.
- If you see hard water stains, sprinkle baking soda and scrub gently.
- Rinse by flushing with plenty of water.
3. Wipe The Seat And Lid
Spray the seat, lid, and exterior with a mild cleaner or white vinegar solution. Wipe thoroughly with paper towels or a clean cloth. Don’t forget the flush lever and hinges—these areas collect grime and germs too.
4. Clean The Seals And Valve
The flush valve (at the bottom of the bowl) has a rubber seal that keeps odors out. Gently wipe this seal with a cloth dipped in vinegar or a recommended RV cleaner. Never use sharp objects or harsh chemicals here—damaging the seal leads to leaks and smells.
5. Maintain The Black Water Tank
- Pour a tank-safe cleaner or a mix of vinegar and water down the toilet.
- Fill the tank with a few gallons of water (follow your RV manual’s advice).
- Add a dose of holding tank treatment to help break down waste and control odor.
- Let the tank sit for several hours or overnight if possible, then empty it at a proper dumping station.
- Rinse the tank with clean water if your RV has a built-in flush system.
6. Freshen And Finish
To keep things fresh, sprinkle a little baking soda in the toilet bowl or use a deodorizing drop-in. Wash your hands thoroughly after removing gloves.
How Often Should You Clean A Camper Toilet?
Frequency depends on how much you use your RV:
- Heavy use (full-time RVers or families): Clean the toilet and add tank treatment at least once a week.
- Occasional use (weekend trips): Clean after every trip.
- Long-term storage: Clean thoroughly before storing and again when you reopen your RV.
Neglecting regular cleaning leads to stubborn stains, stuck valves, and strong odors that are hard to remove.
Choosing The Right Cleaning Products
Many first-time RV owners make mistakes by using the wrong products. Here’s how to choose the right ones:
- Check for “RV-safe” or “septic safe” labels: These cleaners won’t damage rubber seals or the bacteria in your tank.
- Avoid bleach, ammonia, and harsh acids: These break down plastic and rubber, causing leaks.
- Natural options like vinegar and baking soda: Safe for most camper toilets and good for light cleaning.
- Specialty holding tank treatments: Some are chemical-based, others use natural enzymes. Both types help break down waste and control odor, but enzyme products are usually better for the environment and tank health.
If you’re unsure, consult your RV’s manual or ask at a reputable RV supply store.
Credit: www.clean-camper.com
Comparing Rv Toilet Cleaners
Here’s a look at how common RV toilet cleaners compare on key features.
| Cleaner Type | Safe for Seals | Odor Control | Breaks Down Waste | Eco-Friendly |
|---|---|---|---|---|
| Enzyme-based | Yes | Excellent | Good | Yes |
| Chemical-based | Yes | Very Good | Excellent | No |
| Bleach/ammonia | No | Temporary | Poor | No |
| Vinegar/baking soda | Yes | Good | Fair | Yes |
Deep Cleaning And Dealing With Tough Stains
Sometimes, regular cleaning isn’t enough. If you notice persistent stains, bad odors, or slow flushing, it’s time for a deep clean.
Deep Cleaning Steps
- Empty the black water tank completely at a dump station.
- Fill the tank halfway with warm water.
- Add a strong RV tank cleaner (not bleach), following the label instructions.
- Let the mixture sit for several hours. For best results, drive your RV around so the solution sloshes and scrubs the inside of the tank.
- Drain and rinse the tank thoroughly.
- For stubborn stains in the bowl, make a paste of baking soda and water, apply to stains, let sit, then scrub gently.
Dealing With Calcium And Limescale
Hard water leaves white or yellow buildup in the bowl and tank. Use vinegar or a calcium remover made for RVs. Never use home toilet descalers, as these can damage your camper’s plumbing.
Removing Black Tank Odor
Persistent odors often mean waste is stuck to tank walls or sensors. Try an overnight soak with enzyme treatment, and always store your RV with a few inches of water and treatment in the tank to prevent drying and buildup.
Maintaining Seals And Valves
A common mistake is forgetting to care for the rubber seals that keep your toilet leak-free and odor-tight. Dry seals crack and fail, causing leaks and smells.
- After cleaning, apply a small amount of plumber’s silicone grease to the flush valve seal (check your manual for the right product).
- Never use petroleum jelly or oils; these break down rubber over time.
- If you notice leaks, replace the seal as soon as possible. Most RV stores sell replacement kits.
Cleaning Cassette And Composting Toilets
If your camper has a cassette toilet:
- Remove the cassette (waste tank) and empty it at a dump station.
- Rinse the cassette with water and a mild, cassette-safe cleaner.
- Add a small amount of holding tank treatment before reinstalling.
- Clean the bowl and seat like a standard RV toilet.
For composting toilets:
- Follow the manufacturer’s cleaning steps closely.
- Empty the solids and liquids containers as directed.
- Clean the bowl with vinegar or a composting toilet cleaner.
- Never use harsh chemicals, as they kill the bacteria needed for composting.
Preventing Common Camper Toilet Problems
Regular cleaning prevents most problems, but there are a few extra steps you can take to avoid trouble.
Use The Right Toilet Paper
Only use RV or septic-safe toilet paper. Regular household paper can clog the system and cause tank sensors to fail.
Flush With Enough Water
Skimping on water leads to clogs and stuck waste. Hold the flush lever down a few extra seconds to let more water flow.
Add Holding Tank Treatment After Every Dump
After emptying the black tank, always add fresh water and treatment. This keeps waste soft and prevents odors.
Keep The Toilet Lid Closed
This simple habit keeps insects out and reduces odor in your camper.
Don’t Ignore Slow Flushing Or Leaks
If your toilet flushes slowly or leaks, fix it quickly. Waiting can turn a small problem into a big repair job.
Comparing Camper Toilet Types For Cleaning Needs
Choosing the right toilet type can make cleaning easier or harder, depending on your travel style. Here’s how the main types compare:
| Toilet Type | Cleaning Difficulty | Tank Maintenance | Best For |
|---|---|---|---|
| Gravity Flush | Moderate | Regular | Most RVs |
| Cassette | Easy | Frequent | Small campers |
| Composting | Low | Minimal | Eco-friendly use |

Credit: www.youtube.com
Two Surprising Tips Most Beginners Miss
- Always travel with a spray bottle of vinegar. It’s a safe, multi-use cleaner for emergencies, spills, or odors. Unlike many chemicals, vinegar doesn’t harm the tank or seals.
- Flush with hot (not boiling) water after dumping the tank. A hot water flush helps dissolve stuck waste, keeps tank sensors clean, and reduces bad smells. Just make sure your RV’s pipes can handle the temperature.
What Not To Do When Cleaning A Camper Toilet
- Never pour boiling water down the toilet. This can warp plastic pipes.
- Don’t use household drain cleaners. They’re too harsh and can destroy your plumbing.
- Avoid mixing chemicals (like bleach and ammonia). This can create toxic fumes.
- Never leave the black tank open at the campground. This dries out the tank and makes waste stick to the sides, causing clogs and odors.
Credit: thepopupprincess.com
Safe Disposal And Environmental Tips
Always dump waste at official RV dump stations. Pouring black tank contents anywhere else is illegal and harms the environment. Use eco-friendly tank treatments whenever possible. If you camp off-grid, research local dumping rules and follow them closely.
For more on proper RV waste disposal, see the guidelines from the EPA.
Frequently Asked Questions
How Do I Get Rid Of A Bad Smell In My Camper Toilet?
Start by cleaning the bowl and adding a fresh holding tank treatment. If the smell remains, deep clean the black tank with an enzyme cleaner and rinse thoroughly. Check for leaks or stuck waste on tank walls.
Can I Use Bleach Or Regular Toilet Cleaner In My Rv Toilet?
No, avoid bleach and strong home toilet cleaners. They can damage seals and kill the good bacteria in your holding tank. Use only RV-safe cleaners.
How Do I Prevent Clogs In My Camper Toilet?
Use plenty of water with each flush, only use RV-friendly toilet paper, and treat the holding tank after each dump. Never flush wipes, feminine products, or paper towels.
What Should I Do If My Rv Toilet Is Leaking?
Check the rubber seal around the flush valve for cracks or wear. Replace it if needed. Tighten any loose fittings, and avoid overtightening, which can crack plastic parts.
How Often Should I Deep Clean My Black Water Tank?
At least once every season or after every long trip. If you notice odors, slow drainage, or inaccurate tank sensors, do a deep clean sooner.
A clean camper toilet makes every trip more comfortable and worry-free. With the right supplies, good habits, and attention to detail, you’ll avoid most of the common problems new RV owners face. Take care of your camper’s bathroom, and it will take care of you on every adventure.